Walkthrough : Importing many items
Building off the quickstart, this walkthrough will demonstrate importing a large (over 250 items) amount of data into your site. This example is built off Stationary Inc, a small demo business that manufactures and sells stationery. Recently they have had a successful marketing campaign which has generated several hundred new leads. These leads have been exported from their campaign system as a spreadsheet and now we are intending to import these new leads into the site.
Setting up the worksheet
First lets navigate to Data and login to our site.
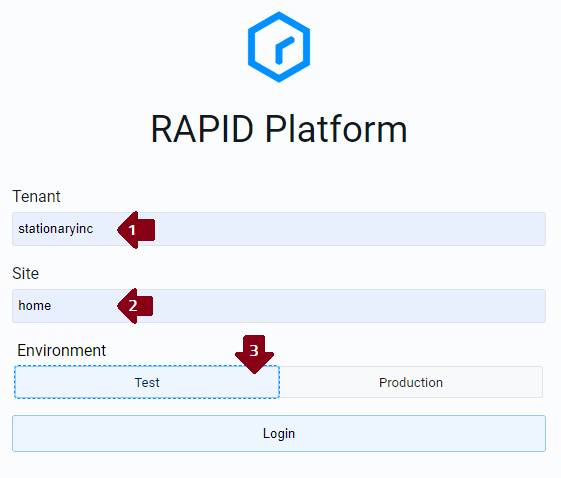
Here we enter the tenant (1) and sitename (2). For our example we are selecting the Test environment, but your site is most likely on Production.
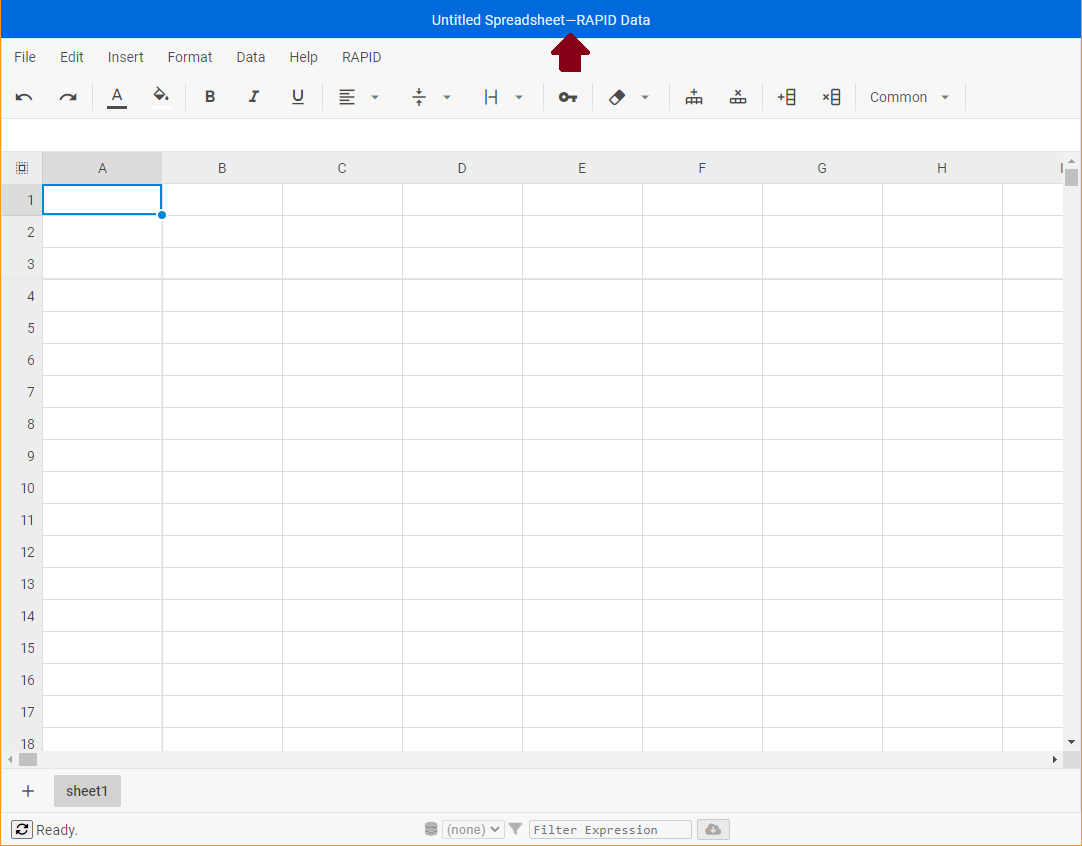
After logging in you will be presented with a blank worksheet like this. Note how the default name of Untitled Spreadsheet is presented at the top.
If we had an existing worksheet we could load it, but for this example lets set up a new one to import Leads into our site. First we choose which Rapid tables we want.
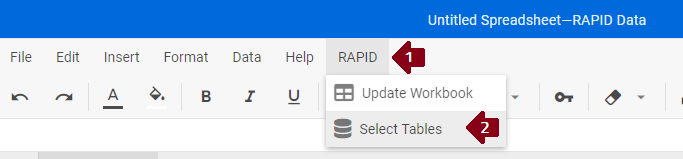
To bring up the Select Tables picker, from the top menu select RAPID (1) then click Select Tables (2).
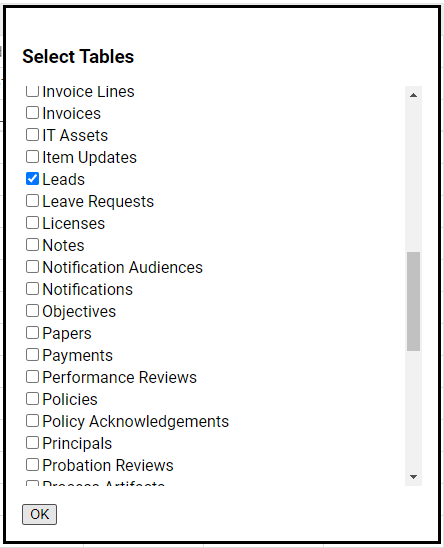
From here we will scroll down and select Leads. There are no other tables we want to interact with, so we then press OK to finish picking tables.

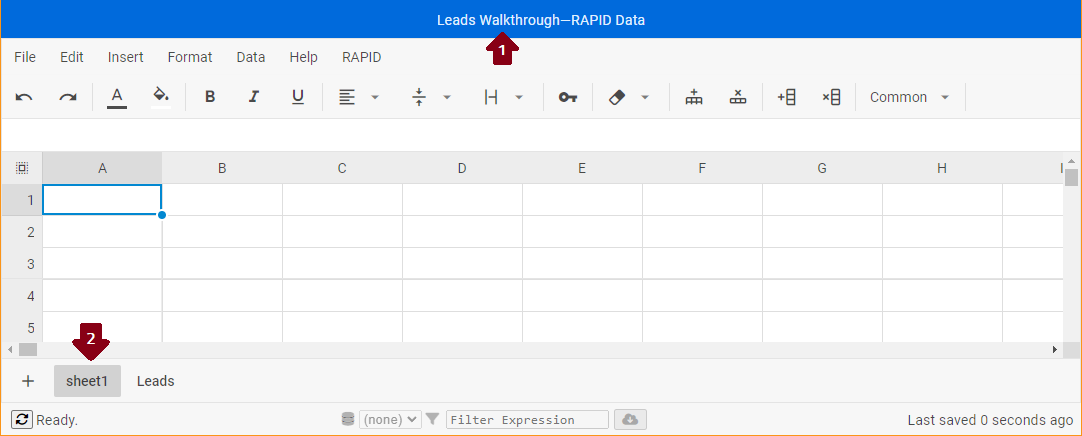
Data has automatically created a new worksheet for each selected table, and populated the columns ready for data entry. The final step is to save our worksheet and give it a name, either by selecting File -> Save under the top menu or pressing CTRL + S.

After saving the title of the document will change to reflect your chosen name (1) and the first worksheet tab will be selected (2).
Preparing the data for import
Currently our data is in Excel.
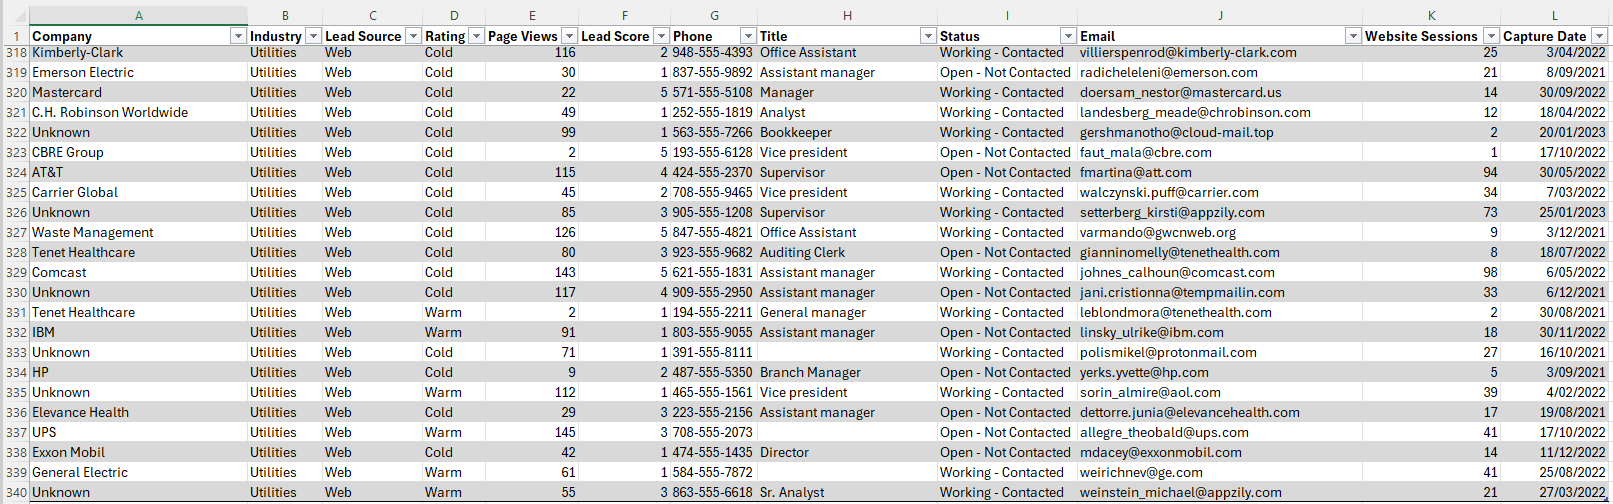
By copying and pasting, we can apply the content we want to upload to the site to the appropriate columns. Our source data does need a few tweaks, here we will change the date to be in YYYY-MM-DD format (for example, 2022-04-03), update the industry match their ID's in our Rapid site and update the Lead Status to match the choice field configuration.
We have more in-depth coverage of Lookups and Dates in our Column importing examples.
Importing everything to the site
Syncing is easy. With the the data prepared we press the Sync button in the bottom left corner.

This brings up the syncing modal where we can choose if importing items triggers webhooks in the site. For our site it doesn't matter if webhooks are triggered so we will leave that unchecked.

Finally, hitting OK will start the data import and we can watch the IDs fill in as items are loaded into the site.

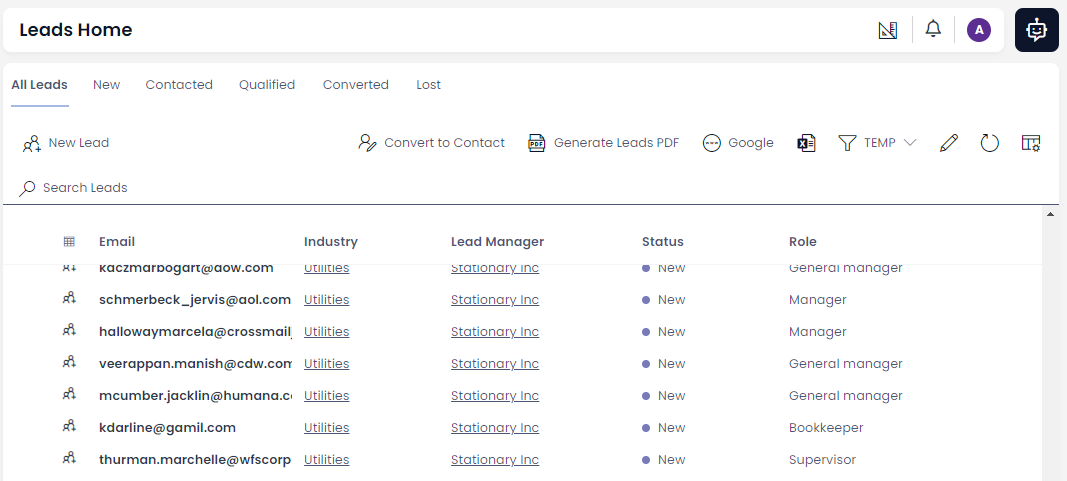
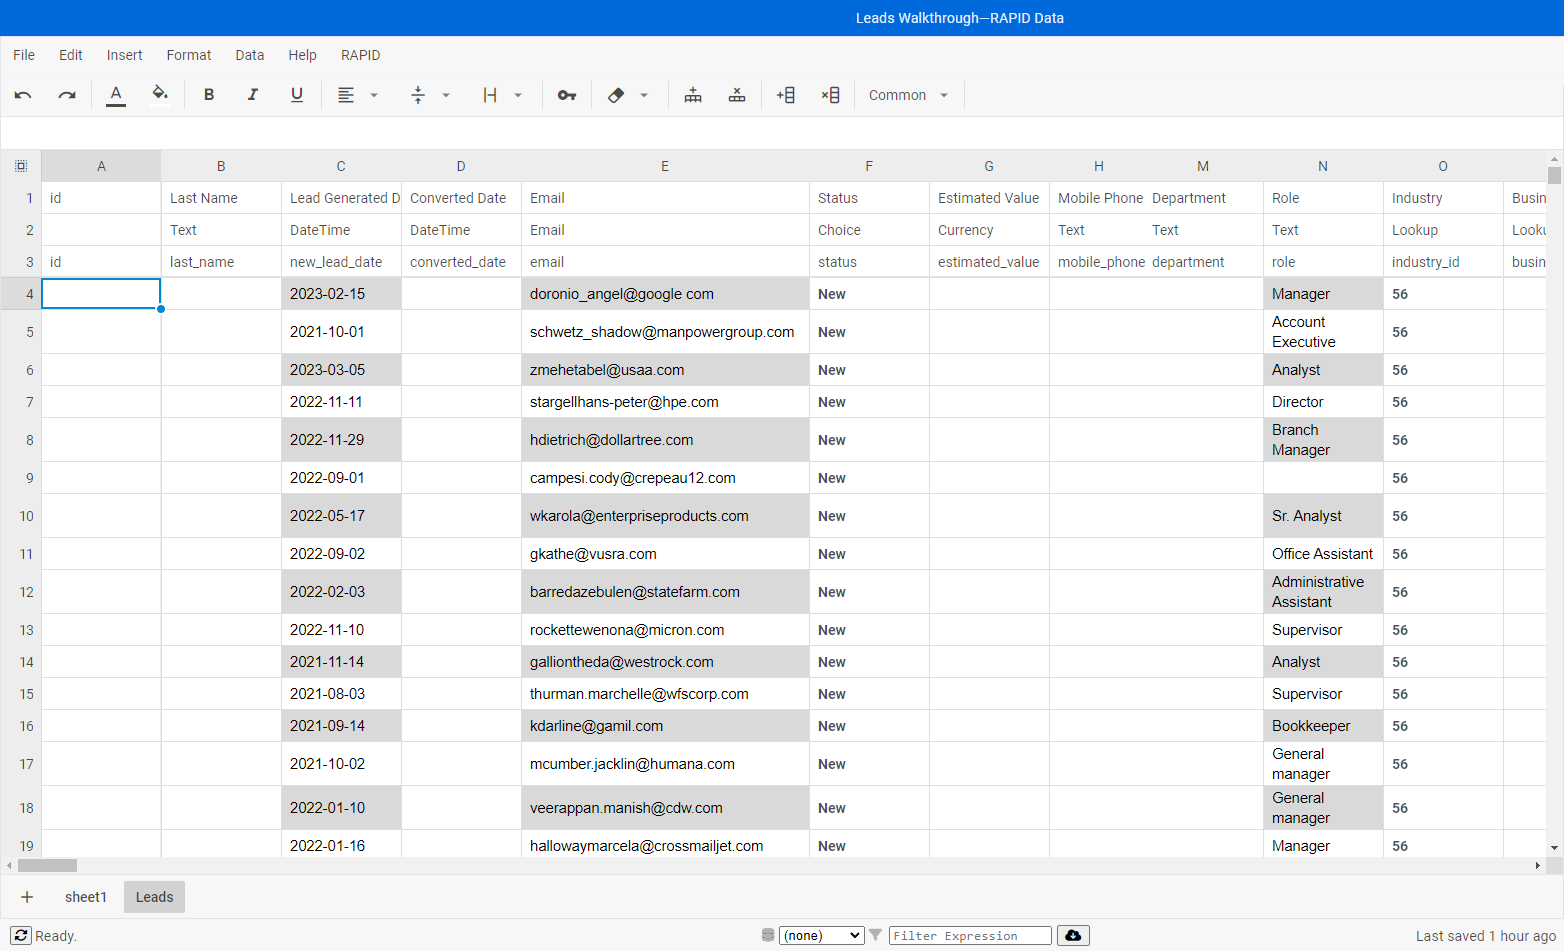
Here we can see the Leads have come across into the site. Mission accomplished!